Top 3 Products & Services
| 1. 2. 3. |
Dated: Aug. 13, 2004
Related Categories
Microsoft OutlookBy
For affordable web design, web hosting, domain registration, and custom programming services, visit .
Ever tried to create your e-mail account again in Outlook or Outlook Express when you change ISPs or web hosts, only to find that you just can't get it to work? This article explains in simple steps everything you need to do to get yourself back online.
Microsoft Outlook Express 6
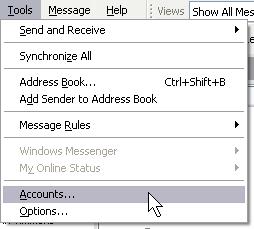
Step One: Open Outlook Express, click the Tools menu, and then select Accounts. The Internet Accounts dialog box will pop up.
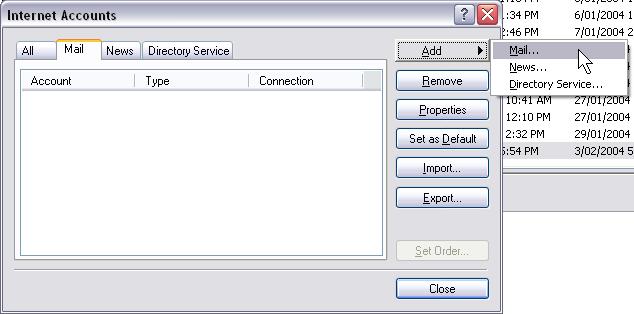
Step Two: Click the Add button, followed by Mail…
Step Three: Enter your name as you would like it displayed to the people you send e-mail messages to, then click Next.

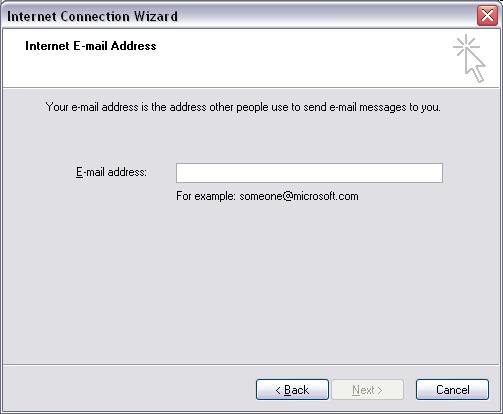
Step Four: Enter your e-mail address. Make sure you include it in full, and double-check that you've spelt it right. For example, if your e-mail address is , remember to include the .net at the end. Once you've done that, click Next.
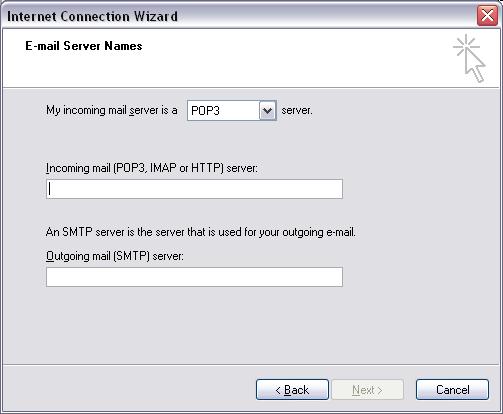
Step Five: Enter the e-mail servers provided to you by your Internet Service Provider or web host. If you don't know the servers that you should use, check with your Internet Service Provider or web host. In most cases, they would both be mail.yourdomain.com.au. Do not include any www. or http:// in the mail server addresses. Unless you are advised otherwise, leave "POP3" selected in the dropdown selection box at the top.
After you've completed that, click Next.
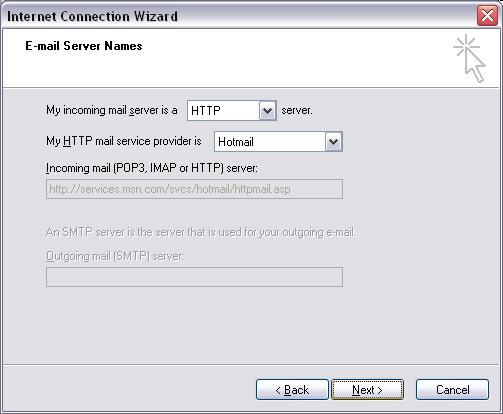
If you are setting up a Hotmail address, select "HTTP" from the dropdown selection box, and then "Hotmail" from the new box that appears. The server address will be automatically filled in for you. Then, click Next.
Step Six: Enter the account name and password that was provided to you by your Internet Service Provider or web host. Normally, the account name is either your whole e-mail address (eg. ) or the first part of your e-mail address (eg. tim). Usually, you would only use the first part of your e-mail address. You don't need to worry about the Secure Password Authentication settings unless you have been advised to.

Step Seven: Click the Next button, and you'll see a screen advising you that your account has been created. Click Finish, and you should then see your account listed, similar to the following:
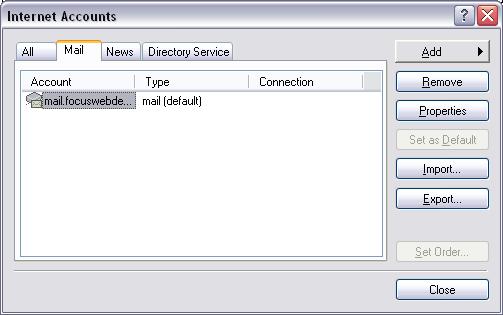
Now click the Close button, and you're done! Then click the Send/Receive button on your toolbar, and your new e-mail account will be checked for the first time.
![]()
Microsoft Outlook 2002
While the following instructions are written for Microsoft Outlook 2002, the process will be similar in any version of Microsoft Outlook.
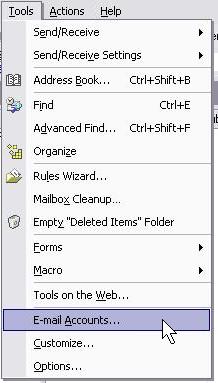
Step One: Open Outlook Express, click the Tools menu, and then select E-mail Accounts. The E-mail Accounts dialog box will pop up.
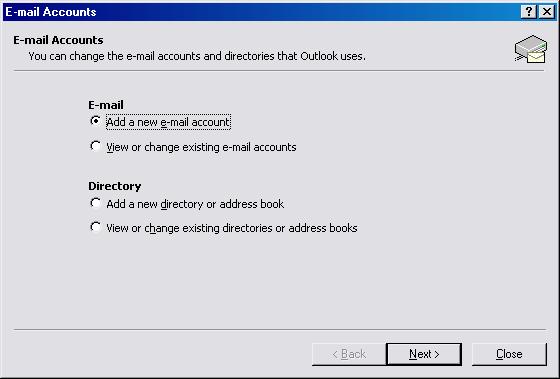
Step Two: Select Add a new e-mail account, and click Next.
Step Three: Select the POP3 option, and click Next. If you are creating a Hotmail account, you will need to select HTTP instead.

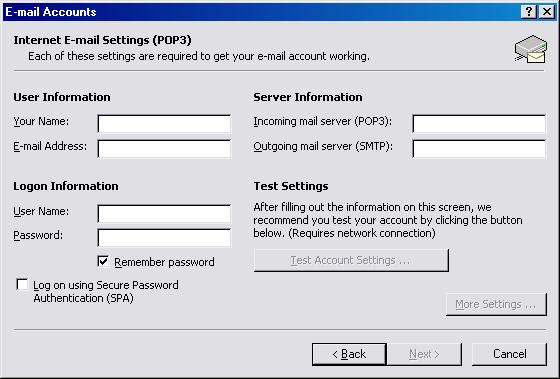
Step Four: Enter your name, as you would like it displayed to people you send e-mails to, and your full e-mail address - eg. if your e-mail address is tim@focuswebdesign.net, don't forget the .net. Then, enter your incoming (POP3) and outgoing (SMTP) mail servers. These were provided to you by your Internet Service Provider or web host, and are normally something similar to mail.yourdomain.com.au for both of the servers.
Next, enter your username and password, also provided to you by the Internet Service Provider or web host. Normally, your username will be either your full e-mail address (eg. tim@focuswebdesign.net) or the first part of your e-mail address (eg. tim). Usually, you'll only use the first part.
Now, click Next.
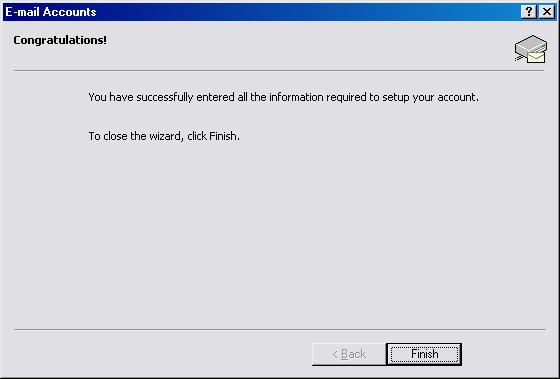
Step Five: Click Finish and you're done! Now click the Send/Receive button on the toolbar to check your account's messages for the first time.
Now that you've gotten free know-how on this topic, try to grow your skills even faster with online video training. Then finally, put these skills to the test and make a name for yourself by offering these skills to others by becoming a freelancer. There are literally 2000+ new projects that are posted every single freakin' day, no lie!
 Previous Article |  Next Article |